Tips When Making And Using Homemade Food Dehydrator
Food dehydration is a very quick and easy method of preserving food—any foods you may have in your fridge (especially ones with little water content). If you are a camper or hiker, you’ll find dehydrated foods particularly beneficial as they weigh far less than fresh foods, last longer, and are much healthier than store-bought alternatives. Even if you don’t indulge in such sport, food dehydration is a great way to eat healthy, save time, and save money. There are many different types of food dehydrators available on the market these days, but if you are the kind of person that likes to DIY, you can easily make a dehydrator on your own.
It may sound impossible. After all, professional food dehydrators are quite expensive and coveted products. And yet, food dehydrators aren’t quite as difficult to create as you might think. Sure, if you’re looking for a machine with the bells and whistles that we’ve all come to expect from contemporary kitchen appliances, then you’re going to need to purchase one from the store. However, if you’re simply looking for an efficient machine to take care of your dehydrating basics, then it’s absolutely possible to build one yourself, and we’ll tell you exactly how!
To begin, you will definitely need a heat system. There are different options for you to consider—electrical, solar, and even wooden. The best way to ensure that the dehydration process is done perfectly is by loading in the food vertically on plates with holes to create air ventilation both from below and above. However, when dehydrating this way, you may encounter a little problem. In this formation, the foods placed on the lower level might not get enough air from the top. Thankfully, there is a way to prevent this problem. When dehydrating foods, place those with higher water content on the top level and those with lower water content below. This will help compensate for the issue and ensure that all of your food is dehydrated evenly.
Making Your Own Electric Food Dehydrator
Now let’s get into the construction process. It will be easier than you think. First, let ‘s explore the basics. Below are all of the necessary tools that you will need to create a DIY electric food dehydrator.
• Wooden dowels
• Tap
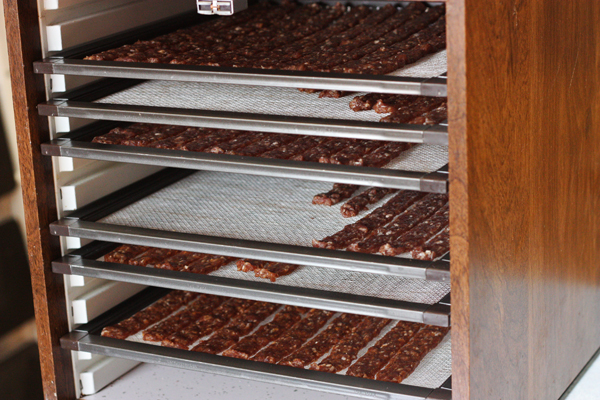
• Racks
• Light/heat source
• Large box with wings to close
• Aluminum foil
After gathering together all those materials, the first thing you will need to do is fix the aluminum foil in the inner walls of the cardboard box. You will need some tape to keep the foil firmly in place within the box. The next step is to create a little opening at the base of the box and then attach the light/heat source to generate warmth in the box. Make sure to take special care when creating this hole as the opening needs to be well insulated and small. As a safety precaution, cover the aluminum foil with more tape to keep the foil safe from the wire. This will prevent hazards like short-circuiting and fire.
To ensure that your homemade food dehydrator works well, you must adhere to some simple rules. First, you will need to get a fan attached to the dehydrator and you will also need a good source of heat. Take special care when following each of these steps because they are important. The fan you acquire will need to blow air on all of the layers of the system. When attaching the fan, try to place it either to the side or below the lowest level so that it will efficiently distribute air across all levels. If the fan doesn’t disperse all of the air evenly, your batches of dehydrated food will come out inconsistent. So this is a vital step that must not be overlooked.
More Tips For Using Your Homemade Food Dehydrator
There are many undeniable benefits to making your own food dehydrator. Among the top of the list is cost. Obviously, you are going to minimize your costs by making a dehydrator over buying one. But there are certain things to take note of to ensure that your dehydrator is functioning properly and effectively. To boot, you should buy a kitchen thermometer in order to monitor the temperature of your dehydrator. If you can’t monitor the heat of your dehydrator, it is going to be very difficult to know how long to leave the food. So do not skip this step!
Some people may use light bulbs to provide heat for their dehydrator. It makes sense (and will light up the food for monitoring). However, light bulbs aren’t the only options for heat. Why not try cone heaters? They have proved to be much more effective because they provide more heat and even last longer than a lightbulb. For air circulation, it won’t be a bad idea to make use of computer case fans since they are cheaper and equally effective. In addition, they are designed to work under hot conditions and run smoothly over long periods of time. You can easily pick up computer fans used at any computer repair shop around you.
If you follow the right setup process, you will quickly understand that there is no major difference between homemade dehydrators and the expensive commercial ones when it comes to efficiency and durability. In fact, most people who have used both types of food dehydrators prefer the homemade ones. Apart from their low cost, they tend to dehydrate faster and last longer than the commercial models. If you follow some of the tips mentioned here, as well as the information gathered from other sources, you can definitely build a powerful food dehydrator at home.
Our advice? Don’t be intimidated or scared. It is surprisingly easy to build your own dehydrator. After all, commercially manufactured food dehydrators are a fairly recent innovation. Making your own dehydrator used to be the standard. So, it’s really not that uncommon and best of all, you can customize your homemade dehydrator to suit your personal dehydrating needs rather than being stuck with what some appliance company thinks you need in the machine. If nothing else, this option is absolutely worth considering and should not be overlooked!
I am using a heat lamp bulb if I put the bulb in the top of the dehydrated due to dripping from meat(jerky)will it heat the box the same as putting it in the bottom or will it bust the bulb
Put the bulb in the bottom and use light gauge galvanized sheet metal to make a shroud to protest the bulb from drips.