How to dehydrate herbs in food dehydrator?
Do you find ever find yourself getting annoyed at buying herbs from the grocery store? It seems like there’s never enough in the package and they rarely have the flavor that you crave. Either you’re stuck with disappointing store bought herbs or you’ll find yourself spending vast quantities of cash on gourmet herbs that run out quickly. It’s a constant battle, but it doesn’t have to be! It’s not as if chefs and home cooks have been buying herbs from grocery stores forever. Growing and drying your own herbs at home is a simple cost saving process that won’t just save you money, but will also improve the quality of the meals that you serve your family.
Drying herbs is a great way of preserving their flavor, cutting grocery costs, and having an assurance of supplies even when certain herbs are out of season. Using a food dehydrator makes this a breeze! Dehydrating your own herbs is clean and fun process. Whether herbs are blossoming in your own garden or you have a seasonal supply from the market, dehydrating them will allow you to enjoy their flavors for a long time.
So how does one go about drying herbs? We map it out in a step-by-step guide below, and also share the best method for safe storage!
Pre-dehydration Procedures
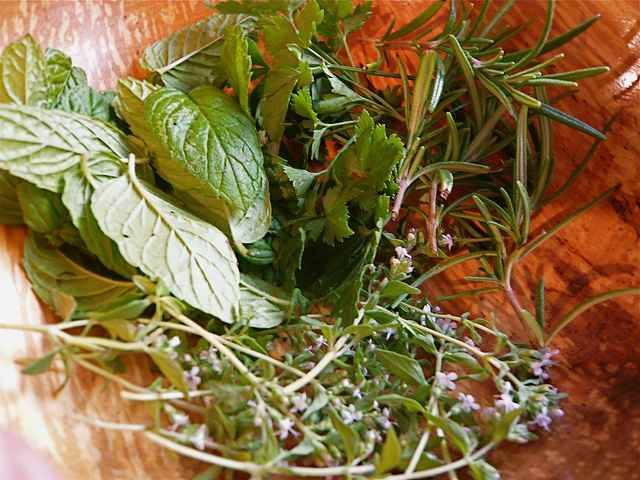
The first step in herb dehydration is the collection and selection of all the right herbs. If you have herbs growing in your backyard garden, make sure to pick them out on the cool hours of the day before commencing the drying process. If you plan to select your herbs from a local grocery store, take special care to identify those looking fresh, leafy, and healthy. Grocery stores don’t always carry the best quality herbs, so it’s important to select the best available to ensure the dehydration goes smoothly.
Next up, it’s time to carefully clean the herbs using running water. This is an important part of the process because it removes dirt, small warms, molluscs, and any residue chemicals that may be stuck on the surface. If these unfortunate elements dry together with your herbs, they can alter the flavours and even cause allergic reactions upon consumption. After thoroughly rinsing off your herbs, place them between two sheets of paper towel to remove water accumulated on the surface and in the creases. It is at this point that the herbs will be ready to be put in the food dehydrator.
Place the herbs in single layers and heat for a few hours
Next up, place the herbs on a single layer in every rack, leaving a small space between splits for effective air circulation. For herbs with large leaves such as basil, mint, sage, and bay, it is advisable to pluck them from the stalk and place them independently on dehydrator racks. This will make the drying process faster and avoid any loss of flavour. Stalks are not your friend here. Get rid of them!
It is important to note that while different types of herbs can be dehydrated together, it is not recommended because flavours are easily lost. Therefore, it’s best to dehydrate one particular herb at a time. An awkward cross contamination of flavors can easily ruin entire batches of herbs.
Next, place the racks with selected herbs in the dehydrator and set the temperature between 90°-115°F. This is the recommended temperature level for herbs, so do not deviate from it. The dehydrator will dry and clear all the moisture from the herbs in about 2-4 hours. How will you know when the herbs are ready? Check in and only remove your herbs at the point in which they shatter and break with ease. The stems will feel very fragile and break even when bent a little. That’s what you’re looking for. Anything less and your herbs won’t be sufficiently dry.
To avoid over-drying the herbs and losing flavour, consider setting your dehydrator up to 2-3 hours to check in on the dehydration status. While some herbs will take over 3 hours to dry, others such as tarragon, oregano, mint, and basil are very soft and might be completely dry and ready for storage in just 2 hours. Herbs should only be dehydrated to the level that most of the water is lost. However, if they are dried for too long, it will kill the enzymes that give the herbs their characteristic flavor. This is a delicate drying balance, so pay special attention to your herbs and make sure that they are removed from the dehydrator at just the right time.
Remove the herbs and immediately store in airtight jars
The dehydration process is not totally complete without using the right airtight jars for storage. Pick the whole dried leaves and place them in large jars with tight fitting lids. The herbs can be crumbled to take less space and then plopped into airtight jars ready for use the next time that you are making snack or preparing tea or spices. It’s important to store your dried herbs properly or they will not last for very long.
Dehydration concentrates the flavors and enzymes in a way that ensures dry herbs are about 4 times more potent than fresh herbs. Therefore, this has to be factored in when using your dried herbs in recipes. Only use the right quantities and compensate appropriately for this potency to achieve the enjoyable flavors you are anticipating in your tea, pizzas, and other foods. Below is a video of what dehydrating herbs looks like with the Nesco Food Dehydrator.
Conclusion
Drying our your own herbs is really quite simple, but the benefits are huge. Knowing how to dehydrate herbs in a food dehydrator will give you the flexibility, control, and assurance that comes with having a constant supply of herbs both in and out of season. The process is easy, fast, and reliable when applied carefully as outlined in the steps above. Never again will you be forced to watch your lovely herb garden go to waste or dread the lack of seasonal herbs at the grocery store. From now on, you’ll have access to the exact herbs that you want, when you want them! Just make sure to store the dehydrated herbs in airtight jars for longevity.